How To Test Your Soil pH
Having a great landscape starts with nurturing your soil. You simply cannot have a healthy, green lawn or a bountiful garden without having healthy soil. Part of keeping your soil healthy is by testing it regularly to ensure that pH levels are in the optimal range for proper root development, nutrition distribution, and to encourage a healthy amount of microbial activity.
Testing your soil’s pH levels is a beneficial practice that should be incorporated into any healthy lawn and garden routine. If you’re not sure where to start or you’re unfamiliar with the practice of soil pH testing, read on for more information about understanding what soil pH is, why it’s important and easy-to-follow instructions for conducting a proper soil pH test!
What is Soil pH?
Measuring soil pH (potential hydrogen) is the practice of measuring the acidity or alkalinity of the soil. pH is measured on a base 10 logarithmic scale from 0 to 14, with 7 being neutral. A pH of less than 7 is acidic and a pH of more than 7 is alkaline.
Because the pH scale is logarithmic, each number represents a ten-fold change, meaning that a soil sample with a pH of 5 is ten times more acidic than a soil sample with a pH of 6. Knowing this, you can see why small changes in the pH of the soil can have a big effect on the health of plants.
Certain plants thrive in different levels of acidity or alkalinity. Grass plants, for example, grow best in soils with a pH ranging from 6.2 to 7.0 (slightly acidic to neutral). While some weeds like dandelions and moss tend to thrive in acidic soils and chickweed is commonly found in alkaline soils. If your lawn is covered in dandelions, this could be an indicator that your soil is too acidic. Testing your soil pH and researching the optimal pH levels of your plants will give you the knowledge to provide the correct environment for your lawn or garden to thrive. Once you know your soil’s pH level then you can accurately determine how much product you need to amend your soil.
Why Testing Your Soil’s pH Is Important
Performing a soil pH test is important because soil pH levels affect your plant’s ability to absorb necessary nutrients for growth. For lawns specifically, soil pH levels have a direct impact on the plant’s ability to absorb nutrients, such as nitrogen, phosphorus, and potassium needed for proper germination.
Soil contains tiny microorganisms that aid in breaking down these vital nutrients and organic compounds for plants to use. When soil is at the proper pH level, growth and reproduction of microbes begin to increase. If the soil is too acidic or too alkaline, however, healthy microbial activity will decrease and eventually stop. This can render the fertilizers you add to your soil useless and negatively affect the overall health of your lawn or garden. Your plant’s soil needs a healthy balance of nutrients in order to grow and build resistance to fight off diseases.
Some nutrients can only be accessible in neutral or alkaline soil. Having an improper soil pH can make these nutrients unavailable to your plants and leave lasting, damaging effects. For lawns, this includes: weed and insect infestations, yellowing or bare spots, poor root development, and decreased microbial activity.

Fun fact: Most plants thrive in soils with a pH between 6 and 7.
When To Test Your Soil pH
You should test your soil’s pH levels prior to planting any new seeds, whether that is grass seed or for your garden beds. If you have recently amended your soil, you may want to test the pH again to determine if you need to apply more product.
Testing your soil’s pH should be a part of regular lawn and garden maintenance, so soil pH tests should be performed every year to ensure that your soil’s pH is in a healthy range and that none of your hard work goes to waste.
How To Conduct A Soil pH Test
You can test your soil’s pH by either sending a comprehensive soil sample to your local county extension office, who will send the sample to a testing lab (usually for a small fee) or by using an at-home testing kit. We recommend Jonathan Green Soil pH Test Kit, as it’s easy-to-use for lawns and gardens and includes everything you need to measure your soil’s pH levels in just a few minutes!
Here are step-by-step instructions for using the Jonathan Green do-it-yourself, soil pH test:
1. Collect soil samples from your lawn
In order for your soil sample to be representative of your entire lawn’s soil pH levels, you will first need to gather small soil samples from four different sections of your lawn. Using a gardening trowel, dig about four to six inches into the soil and collect a small soil sample from each section. Remove any debris, grass, or thatch from your samples. Mix all four small samples together for one, cohesive sample to use for your test. If you are testing multiple areas, like a lawn and garden, or a front and back yard, we recommend doing two separate tests to get a representative soil sample.

2. Fill the test container with the soil sample
Once you’ve collected your soil sample, remove the cap off of the color comparator included in the testing kit and take out the capsule. Make sure the color chart is in place. Fill the test container to the fill line with the prepared soil sample. Then, carefully separate the two halves of the capsule and pour the powder into the test container.
3. Add distilled water to the test container
Using the provided dropper, add distilled water to the water fill line. It is important to only use distilled water for your soil pH test. Using tap water could give you an inaccurate result, as usually has been treated.
4. Shake the test container and allow to settle
Once you have added water to your test container, carefully place the cap back on the container and shake thoroughly. Allow the container to settle for one to five minutes.
5. Observe test container for results
Once the time is up, observe the container for color changes and compare the color solution to the provided pH chart. Remember that lawns thrive and grow best with a pH ranging between 6.2 to 7.0 (slightly acidic to neutral).
How to Adjust Soil pH
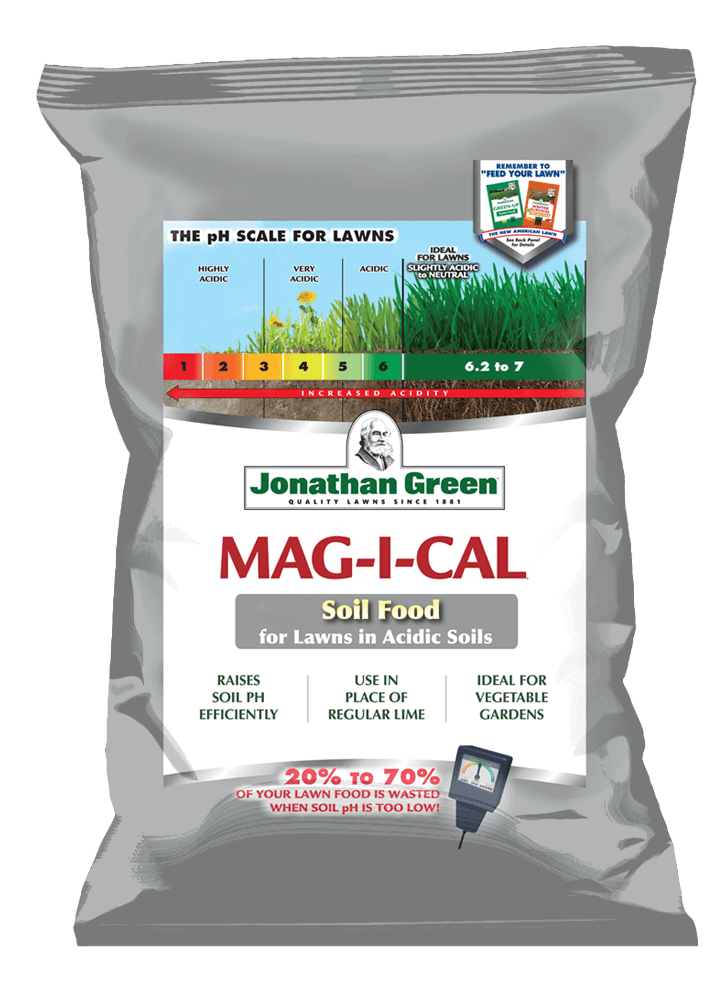
You may need to adjust your soil’s pH depending on the results of your test. Adding lime to acidic soil is a common solution to raise pH levels, however, it takes many bags of lime to adjust the pH a small amount. If your soil’s pH is too acidic, we recommend applying Jonathan Green Mag-I-Cal Soil Food, which includes a form of lime called calcium carbonate, a completely soluble form that is immediately available to adjust soil pH upwards.
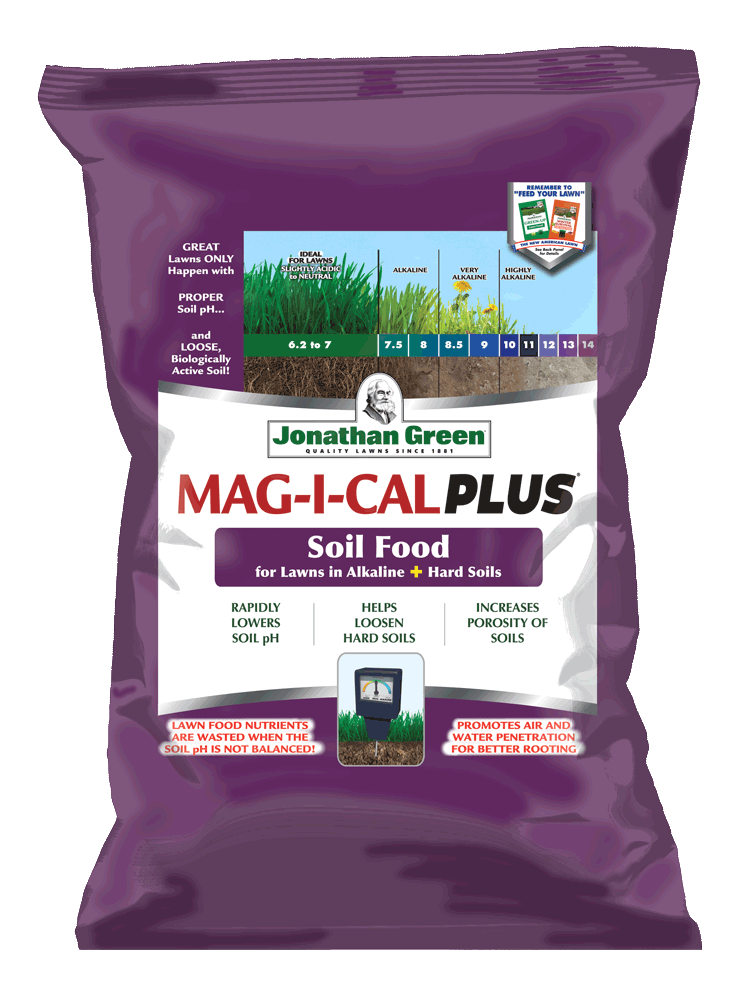
Soil pH levels that are too basic, however, need an element like sulfur to help lower it. The fast-acting sulfur and calcium sulfate found in Jonathan Green Mag-I-Cal Plus for Lawns in Alkaline & Hard Soil both work together to help lower pH levels in order to access vital nutrients in the soil. Plus, it helps relieve soil compaction by stimulating microbial life. Both of these products are safe to use in your garden and your lawn.
Mentioned Products

Conclusion
Testing soil pH levels is an essential practice to include in any healthy, lawn and garden maintenance routine. Having a balanced soil pH will help boost the performance of your fertilizer, aid in your soil’s ability to absorb vital nutrients, stimulate beneficial microbes, and build a stronger root system. By testing your soil regularly, you’ll ensure your lawn or garden has the best foundation to grow plants that flourish throughout every season!